


How To Choose And Use The Best PC Building App For Your Custom Build

Ready to build your dream custom PC without wasting money on incompatible parts? In this guide, you'll discover how to select and use the best PC building app to plan, budget, and validate your entire build before you buy any components. You’ll walk away with a fully compatible build plan that fits your needs and budget.
How will using a dedicated PC building app change your build experience? These tools eliminate the guesswork of part compatibility, help you stick to your budget, and can even show you estimated performance for your use case. But it's important to understand what features to look for, and how to use these tools effectively to get the best results.
Why Using a Top PC Building App Is Worth Your Time
- No compatibility headaches: The app automatically checks if your CPU, motherboard, GPU, and other parts work together, so you avoid costly mistakes when ordering components. This saves you from the frustration of returning parts or dealing with a non-functional build.
- Accurate budget tracking: You can input part prices from multiple retailers in real time, and the tool will tally your total cost to help you stay within your spending limit. You can also easily swap parts to see how changes impact your total budget.
- Performance previews: Many top apps include estimated performance benchmarks for gaming, content creation, or other specific use cases based on your selected parts. This helps you decide if your build will meet your needs before you make any purchases.
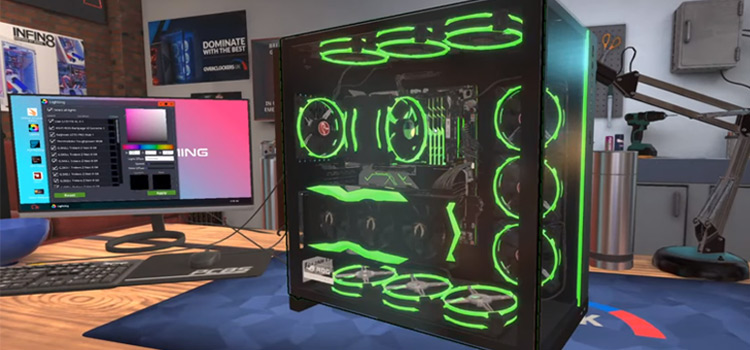
- Build visualizations: Most tools include 3D or 2D renderings of your build, so you can confirm your parts will fit in your selected case and see what the final build will look like. This is especially helpful if you care about the aesthetic of your finished PC.
- Shareable build plans: You can export or share your build plan with friends, online communities, or PC part retailers to get feedback or confirm you’re making good choices. This makes it easy to get second opinions without having to list every part manually.
Step-by-Step Guide to Using the Best PC Building App
Step 1: Define your build goals and budget
Start by listing what you primarily will use your PC for, such as 1080p gaming, 4K video editing, or casual web browsing, and set a realistic total budget range. Knowing your use case will help the app prioritize parts that fit your performance needs. Common mistake to avoid: Don’t forget to include costs for peripherals like a monitor, keyboard, or operating system if you need them in your total budget.
Step 2: Compare top PC building apps to find your match
Test 2 to 3 popular, well-reviewed options such as PC Part Picker, Build My PC, or Corsair’s PC Builder to see which interface and feature set works best for you. Look for features like local retailer price matching, compatibility checks, and performance estimates that align with your needs. Pro tip: Pick an app that sources prices from retailers in your region to get the most accurate cost estimates.
Step 3: Start your build with your core component
Nearly all PC builds revolve around either your CPU or GPU, so select that core component first based on your use case and budget. The app will then filter other compatible parts to match your initial selection, which speeds up your entire planning process. Common mistake to avoid: Don’t pick a high-end GPU if your CPU will bottleneck its performance, the app will usually flag this, but you should still double-check for your specific use case.
Step 4: Select and add all remaining components
Work through the rest of the part list, including motherboard, RAM, storage, power supply, case, and cooling, choosing options that fit your budget and performance needs. The app will run real-time compatibility checks as you add each part, and flag any issues before you move on. Pro tip: Prioritize a high-quality power supply with a good efficiency rating, as this reduces risk of part damage over time.
Step 5: Review compatibility alerts and adjust your build
If the app flags any compatibility issues, such as a CPU that won’t fit your motherboard or a GPU too large for your case, adjust your part selections to resolve these problems. Take time to read the explanations for each alert so you understand why the conflict exists. Common mistake to avoid: Don’t ignore minor alerts about clearance or power supply wattage, as these can cause major issues when you assemble your build.
Step 6: Compare prices and finalize your part list
Once you have a fully compatible build, use the app’s price comparison feature to find the lowest prices for each part from trusted retailers. You can also adjust parts to cut costs or boost performance if you have leftover room in your budget. Pro tip: Look for bundle deals on motherboards and CPUs, as these often save you a significant amount compared to buying parts separately.
Step 7: Save and export your build plan
Save your final build plan to your account, or export it as a list or shareable link so you can reference it when purchasing parts or building your PC. You can also share it with online PC building communities to get feedback from experienced builders before you make purchases.
Challenges to Be Aware Of
- Steep initial learning curve for new users: If you have no prior experience with PC components, you may feel overwhelmed by the number of part options and technical terms when you first open the app. You can mitigate this by starting with pre-built template builds for your use case, then adjusting parts to fit your budget over time.
- Incomplete or outdated part databases: Some less popular apps may not have the latest newly released parts in their database, which can lead to missing options or incorrect compatibility checks. Stick to well-maintained, popular apps that update their part libraries regularly to avoid this issue.
- Price tracking inaccuracies: Retailer prices can change rapidly due to sales, stock shortages, or discounts, so the listed price in the app may not match the actual price when you go to purchase. Always double-check prices directly on the retailer’s website before you finalize your order to confirm your total cost.
- Limited customization for niche builds: If you’re building a highly specialized PC, such as a small form factor build or a server, some general use apps may not have all the specific compatibility checks you need. For niche builds, look for an app that specializes in your specific build type for the most accurate results.
Conclusion
You now have the foundation to choose and use the best PC building app to plan your perfect custom PC. You know what features to look for, how to build your part list, and how to avoid common mistakes that trip up new builders.
Using a top PC building app offers the chance to eliminate compatibility risks, stay within your budget, and build a PC that perfectly fits your performance needs. By taking the time to plan your build properly, you’re setting yourself up for a smooth, successful PC building experience.
Don’t wait for the perfect moment. Start researching and testing top PC building apps today. Your dream custom PC is just a few planning steps away, and you already have all the knowledge you need to get started.
FAQ
How long does it take to plan a full PC build using a PC building app?
For first-time users, planning a full build typically takes between 1 and 3 hours, depending on how much you research individual part options. If you use a pre-made template for your use case, you can cut that time down to 30 minutes or less. Take your time to compare options, and don’t rush through the compatibility check step.
Do I need prior PC building knowledge to use a PC building app?
You don’t need advanced technical knowledge to use most modern PC building apps, as many include beginner-friendly explanations and pre-built templates for common use cases. That said, learning basic terms like CPU, GPU, and RAM will help you make more informed choices as you build your list. Start with the app’s beginner tutorials if you feel stuck at any point.
What's the best way to check if my build will perform well for my use case?
Most top PC building apps include estimated benchmark scores for popular games and productivity software based on your selected parts. You can also cross-reference these estimates with independent reviews online for the specific parts you chose. If you’re unsure, share your build in a PC building community to get feedback from experienced users.
Can I use the build plan from a PC building app to get help with assembling my PC?
Yes, most apps let you export your full part list and build details, which you can reference as you assemble your PC, or share with someone who is helping you build. Some apps even include step-by-step assembly guides tailored to your specific part list. Save your build plan to your phone so you can easily reference it while you’re putting your PC together.


RECOMMEND ARTICLES
Most Read

How To Get The Divine Egg In Roblox Steal An Egg

A Senior's Guide To Reliable Used Cars Under 3.000€ In Europe

How To Properly Manage Weight: A Practical Guide For Everyday Users

How To Make A Delicious Low-Calorie Dinner: A Simple Guide For Home Cooks

Take The FaceZone Filter Test To See How Others See You

How To Stand Out On Roblox: A Complete Guide To Visibility And Followers
Subscribe For New Quizzes


Copyright © 2019-2026 | All rights reserved.