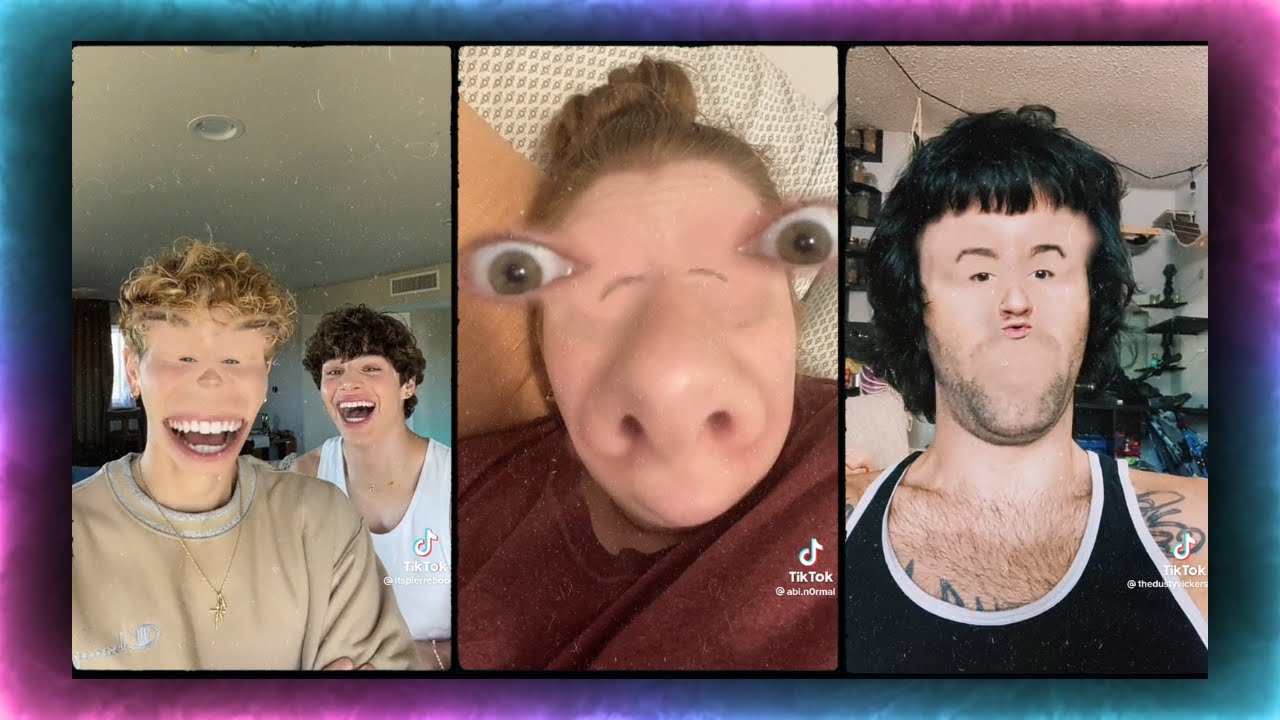
Take The FaceZone Filter Test To See How Others See You

Ready to find out how the people around you actually see your face and mannerisms? In this guide, you'll discover how to complete the FaceZone filter test accurately and interpret results to understand other people's perceptions of you. You'll walk away with actionable insights you can use for social situations and personal growth.
How will this test change how you show up in school, hangouts, and online spaces? Understanding how others see you can help you feel more confident in casual interactions and public settings. But it's important to understand how the test works and what its results actually mean before you start.
Why the FaceZone Filter Test Is Worth Your Time
- Low-effort, high-insight results: You can complete the entire test in 10 minutes or less, with no special equipment beyond your phone. For teens short on time between school and extracurriculars, this is a quick, fun way to get useful personal feedback.
- Creative self-expression practice: Interpreting your test results lets you think about how you present yourself to friends, classmates, and new people. You can adjust small details like posture or facial expressions to match how you want to be seen.
- Relatable content to share with friends: You can compare test results with your friend group to spark fun, low-pressure conversations about perception. It gives you a casual conversation starter that feels relevant to your daily social life.
- Builds small emotional awareness skills: Learning how others may perceive you helps you practice empathy and understand different points of view. This soft skill can help you navigate group projects, friend conflicts, and new social circles more smoothly.
Step-by-Step Guide to the FaceZone Filter Test
Step 1: Find the official FaceZone filter on your preferred social media app
Open TikTok, Instagram, or Snapchat and use the search bar to look for the verified FaceZone "How Others See You" filter. Make sure you pick the filter with the official FaceZone creator tag to avoid inaccurate or modified versions.
Common mistake to avoid: Third-party copycat filters often use outdated algorithms that give skewed, unreliable results, so always check the creator name first.
Step 2: Set up your filming space for accurate results
Find a well-lit room with soft, natural light and no harsh shadows on your face. Prop your phone up at eye level, about 12 to 18 inches away from your face, so the camera captures your features exactly as they appear in real life.
Pro tip: Avoid filming with backlighting from a window behind you, as it will wash out your features and skew the filter's analysis.
Step 3: Film your 30-second clip with natural expressions
Turn on the filter, then talk, smile, and make the same facial expressions you would use in a normal conversation with a friend. Avoid overexaggerating your face or posing, as this will make the final results less accurate.
Common mistake to avoid: Holding a static, stiff face for the whole clip will only show the filter how you look when you're posing, not how you look in regular daily interactions.
Step 4: Let the filter process your clip and generate results
Once you finish filming, wait 10 to 15 seconds for the filter to analyze your facial features, expressions, and mannerisms. The results will break down common perceptions people may have of you, like "approachable," "confident," or "reserved."
Pro tip: If the filter freezes or crashes during processing, close the app, clear your cache, and try filming again with a shorter 20-second clip.
Step 5: Cross-reference results with people you trust
Show your results to 1 or 2 close friends or family members who know you well. Ask them if the perceptions listed match how they actually see you in real life, to separate filter quirks from real feedback.
Common mistake to avoid: Don't take the filter's results as absolute truth right away, as artificial intelligence can miss small context clues that real people pick up on.
Step 6: Take notes on insights you want to act on
Write down 1 or 2 small takeaways from your results that you want to adjust, if any. For example, if the test says you look unapproachable when you're focused, you can practice softening your expression in casual settings.
Pro tip: Focus only on changes that make you feel more comfortable, not changes you think other people want you to make.
Step 7: Save your results to compare later (optional)
If you want, save your test clip and results to your phone so you can retake the test in 3 to 6 months. You can see if changes to your style, posture, or expressions shift how the filter (and people around you) perceive you.
Challenges to Be Aware Of
- Filter algorithm limitations: The FaceZone filter uses general artificial intelligence training data that may not account for cultural differences in expression perception. Results can also be skewed by poor lighting or unusual angles, so always cross-check with real people you trust.
- Risk of overfixating on small flaws: It can be easy to fixate on one negative line in your results and ignore all the positive perceptions listed. Remind yourself that the test is just a fun tool, not a full assessment of your worth or personality.
- Misinterpretation of nuanced results: Some perception labels the filter uses can be confusing or have multiple meanings. If you don't understand what a result means, ask a trusted friend or family member for their perspective before overthinking it.
Conclusion
You now have the foundation to start the FaceZone filter test and interpret its results accurately. You know how to set up your space, film correctly, and cross-check results to avoid common mistakes that lead to unreliable insights.
The FaceZone filter test offers a low-stakes, fun way to explore how other people may perceive you in daily interactions. By using it responsibly, you're positioning yourself to build more confidence and stronger social awareness for school, friend groups, and new experiences.
Don't wait for the perfect moment. Start setting up your well-lit filming space today. The test is quick, low-pressure, and can give you fun insights you can share with your friend group this week.
FAQ
How long does it take to complete the entire FaceZone filter test process?
Most people finish filming and processing their test in 10 to 15 minutes total, including setup. Adding time to talk to friends about your results will add 10 to 20 extra minutes, depending on your conversation. Start with a 30-minute block of free time after school or on the weekend to go through the full process.
Do I need any special apps or equipment to take the test?
You only need a smartphone with TikTok, Instagram, or Snapchat installed, and access to a well-lit space. You don't need to pay for any premium features or download extra software to use the official FaceZone filter. Double check that your social media app is updated to the latest version for the most accurate results.
What's the best way to get the most accurate results from the test?
Prioritize natural lighting, eye-level camera placement, and casual, normal facial expressions for the most reliable outcome. Avoid wearing heavy face makeup or accessories that cover large parts of your face, as they can confuse the filter's analysis. Test a second clip with the same setup to confirm your results are consistent before sharing them.
Can I share my FaceZone filter test results on my social media pages?
You can absolutely share your results on your Instagram stories, TikTok feed, or Snapchat if you feel comfortable doing so. Many teens share their results as a fun, relatable post that sparks conversations with their followers. If you have any private insecurities about specific results, you can edit those parts out before posting to stay comfortable.


RECOMMEND ARTICLES
Most Read
How To Find Basic Actor Jobs To Kickstart Your Acting Career
How To Explore Past Life Death Cause Using Your Date Of Birth

How To Digitize Your Old Paper Documents Using Only Your Smartphone
How To Get The Newest FREE EMOTES In Fortnite

How To Enter Promo Codes To Claim Free Champions: A Complete Player's Guide

How To Get New Emotes In Roblox: A Step-by-Step Guide
Subscribe For New Quizzes
Copyright © 2019-2026 | All rights reserved.